Category Dornier Wal

Dornier Wal – Introduction

The Dornier Do J Wal was a twin-engined German flying boat of the 1920’s designed by Dornier Flugzeugwerke. The aircraft was initially produced in Italy, to circumvent the Versailles Treaty. Both a civilian and a military Wal was produced. The main differences between the two were armament, cockpit location and a passenger cabin. The Dornier Wal proved a popular aircraft, and was exported throughout the world.

The Wal was also used for a staggering 32 world-record-breaking attempts, including an expedition to the North Pole, by Roald Amundsen, various attempts of crossing the Atlantic, as well as a round-the-world trip during 1925 by Wolfgang von Gronau. The aircraft remained in production until 1936.

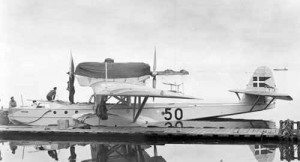
The aircraft is particularly interesting to me, as a Dornier Do-J/III Wal was used by the Royal Danish Navy for their Greenland expeditions.

Specifications (may not be 100% accurate):

Crew: 3
Capacity: 8-10 passengers
Length: 17.25 m (56´ 7″ ft)
Wingspan: 22.50 m (73´10´´ ft)
Height: 5.20 m (17´ft)
Empty weight: 3,630 kg (8000 lb.)
Max takeoff weight: 5,500 – 7,000 kg (12,570 -15,400 lb)
Maximum speed: 170 – 185 km/h
Cruise speed: 145 km/h (91 mph.)
Range: 800 km normal (500 mi)
Service ceiling: 3,500 m (11,450 ft.)
Rate of climb: 33´ to 3,000 m
Engines: various, but initially 2 × Rolls-Royce Eagle IX engines (360 hp) each


Dornier Wal – Acknowledgements


Before I begin the build, I would like to thank Mr. Michiel van der Mey, founder of the Dornier Wal Documentation Center, for his assistance with all the technical details regarding this amazing aircraft. If you have ANY interest in this airplane, visit his website and buy his book. It is well worth the money.

Dornier Wal – 3-view

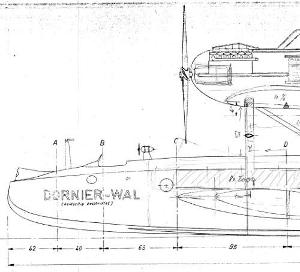
Finally received the 3-view (Thank you Michiel). It is of the Dornier Wal user by polar explorer Roald Amundsen.

At a scale of 1:10, the model will be:

Wing span: 2.25 m
Length: 1.725 m
Height: 0.52 m

A perfect size for an R/C scale model.

There are a few new challenges on this airfraft. First and foremost, the metal construction. Because this is a seaplane, I can’t use aluminum foil for the skin. Instead, I will have to paint it. To get a realistic paint finish is going to take some experimenting.

The second challenge is going to be the engine. I want to use a single engine driving the tractor propeller, and use a free-running propeller as a pusher. I hope it will work out OK.


Dornier Wal – First CAD Entry

As always, the 3-views needs to be imported in the CAD software. It went remarkably well this time. The 3-views are actual Dornier drawings from 1958, and very accurate. I have made flat side-, top-, and front views and “glued” them together. It gives a good idea about how things will fit together. The only thing that doesn’t fit this time is the empenage under the rudder. I will have to look at it, in a bit more detail. Anyway, it looks really good so far, and easy too.

Now, I still do not know if I want to model the Roal Amundsen Wal, or the Danish Navy Wal. The easiest would be to just use the drawings as is, but I kind of like the Danish Navy Wal. The engine on the Amundsen Wal does not look “tough” enough, and I’d like an enclosed cockpit, if I have to fly with it in real life too.


Dornier Wal – Wing Construction

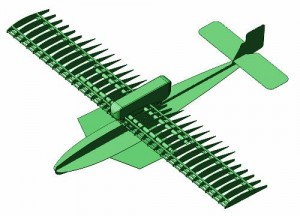
Work is progressing quickly on this airplane. I have already gotten the main wing done up. The wing profile is Göttingen 426. On this aircraft, the fuselage and engine is mounted on struts to the main wing. After I finish the ailerons, I will work on the strut and the wing tips.

Dornier Wal – Photos

A drawing like the 3-view is a 2-dimensional representation of a 3-dimensional object. Unfortunately this results in a loss of details. In other words, it is tricky to convert the 2D drawings back to a 3-dimensional model.

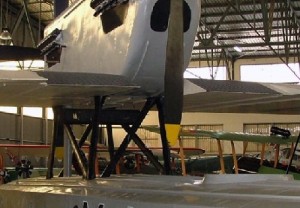
Here is a great example of why photos are so crucial when designing a scale model. The only Wal left is in Argentina, so I’ll have to make do with the photos I can find on the internet.

On the wing I drew, I have found at least four problems – and I thought it looked pretty decent.

From the photo on the right, it is possible to see that:

  1. The trailing edge near the wing-centre is tapered, and not just cut straight off, like I did on my model.
  2. The engine is mounted to the fuselage via aerodynamically shaped metal struts.
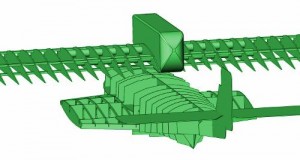
  3. The wings butt up against the engine. In other words, I do not need to split the wings into a center section and two outer wings. The engine IS the center section.
  4. The wings are fabric covered and the rib-outline can be seen through the fabric. I will need a LOT of low-weight ribs, instead of the 12 ribs per wings that I have done so far.

So, I will have to make some modifications. Luckily they are quite easy to do.


Dornier Wal – Wing and Sub-Wing

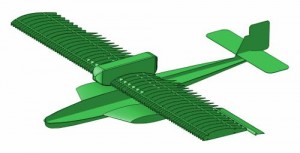
I have now got the correct wing, as discussed in my previous post. The engine is the center section, and the trailing edge has been cleaned up. I have also started on the ailerons, but they taper towards the tip, and I didn’t feel like struggling with the wing tips just yet. Instead I started on the sub-wings, which went really smoothly.

I am thinking about how to mount the sub-wings to the fuselage? Obviously they will take a beating during take-off and landing, so attaching them to the fuselage must be really sturdy, and yet, I can’t punch a pair of aluminium tubes through the fuselage, as water will seep in – One of the many interesting challenges of R/C scale building.


Dornier Wal – Fuselage construction

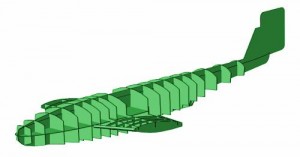
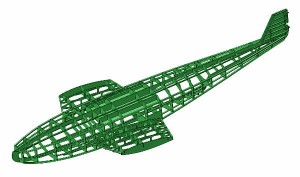
I know I am not quite there yet, but I think I will try to make the fuselage in a different way than what I normally do. This time, I will try to loft the entire fuselage in one piece and then slice it, in a way similar to haw I make the wings. This way has saved me oceans of time when doing the wings, and I hope I can do the same with the fuselage.


Dornier Wal – Fuselage Formers

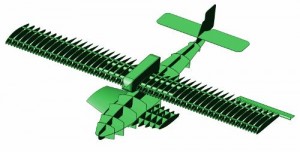
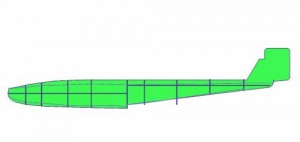
I have traced the existing formers and added them to the fuselage. The formers available on the drawing are about 20 cm apart at scale 1:10, so I will have to loft some additional formers. With this size of airship, I will need at least 10 cm between each former, and maybe even down to 7 cm between each.

Dornier Wal – Cleaning up the formers

I now have to adjust the fuselage formers slightly, until they fit the top and side-views 100%. I do this by drawing in the longerons. Once drawn in, it immediately becomes obvious which formers needs correcting. Lofting based on garbage results in garbage, so I will have to do the clean-up before lofting the remaining formers.

Dornier Wal – Sub-Wing & Keel

Today I was working flat out to get the fuselage done. I completed the keel. It took the most of the day. It required a lot of measuring and interpolating from the 3 sides of the 3-view. I had to loft some additional formers for the fuselage as well, to get this done properly.

When done with the keel, I made the sub-wings part of the fuselage. The sub-wings will be hitting the waves repeatedly, when taking off and landing, and they must be extremely strong. I hope making them part of the fuselage will help, as well as keep water out at the same time.

Dornier Wal – More of the same

I continued with cleaning up the fuselage shape, as well as lofting the missing formers – well almost. The position of the fuselage formers were determined by the location of the windows, and where the wing-struts and engine struts are attached to the fuselage.

It starts to look good, but there is approximately one day more to go, before the fuselage shape is done. I still need to revisit the keel, and add a couple of formers.

When that is completed, I will remove a couple of mm all the way around the fuselage formers, to make room for the fuselage skin, followed by cutouts for any longerons. The flat piece of sheeting running all the way down the fuselage, that I have used as a temporary crutch, also has to go.


Dornier Wal – Specifications

Just a quick update:

Verkehrswal
1. Version
Verkehrswal
2. Version
8.5-Ton Wal10-Ton WalSuperwal
2-Engines
Superwal
4-Engines
Year192319301930193319261927
EnginesRolls-Royce
Eagle IX
BMW VIBMW VIBMW VIRolls-Royce
Condor
Rolls-Royce
Jupiter
BHP2 x 360 BHP2 x 690 BHP2 x 690 BHP2 x 690 BHP2 x 650 BHP4 x 525 BHP
Crew/Passengers3 + 93 + 14454 + 194 + 19
Wingspan22.5 m23.2 m23.2 m27.2 m28.6 m28.6 m
Length17.3 m18.2 m18.2 m18.2 m24.6 m24.6 m
Height5.2 m5.5 m5.5 m5.8 m5.85 m6.0 m
Weight (Empty)3630 kg5050 kg5475 kg6215 kg8000 kg9850 kg
Weight (Max)5700 kg8000 kg8500 kg10000 kg10500 kg14000 kg
Speed (Max)185 km/h225 km/h225 km/h220 km/h180 km/h210 km/h
Ceiling3500 m3000 m3000 m3500 m1700 m2000 m

The Danish Wal was a 10-Ton Wal, while the Amundsen Wal was a Verkehrswal 1. version. There are quite a few differences that I have not yet studied, so I have decided to do the Amundsen Wal for now. It is not difficult to enlarge the wings and slap a new cockpit on the model at a later date, but I think it will be difficult to enlarge the fuselage – particularly if it needs enlarging width-wise too.


Dornier Wal – Updated Fuselage

  • Today I did the following:
    • Cleaned up fuselage shape.
    • Lofted additional fuselage formers.
    • Removed 2-3 mm around fuselage formers for sheeting.
    • Drew lightning holes in the fuselage formers.
    • Added a crutch to the fuselage, required for building.
    • Added longerons to fuselage.
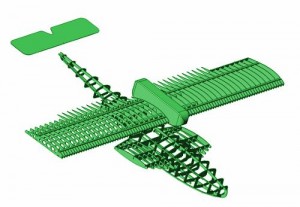
    • Drew lightning-holes in the wings.


    Dornier Wal – Rudder problems

    I now have to draw on Mr. Michiel van der Mey’s expertise. Michiel is the leading expert on the Dornier Wal, and he has graciously offered to help me should I get stuck. I am now going to take him up on the offer. I am having some trouble with the rudder construction, and their hinges in particular. I have sent him an e-mail, and should receive some close-up photos shortly – I hope.

    Dornier Wal – Empenage Details

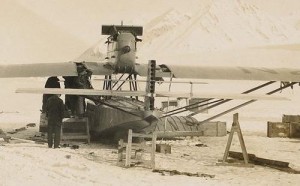
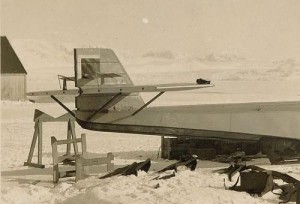
    I received an answer from Michiel, as well as some photos from the Norwegian Polar Institute showing the loading and off-loading of Amundsen’s Dorner Wal. They both confirm that the rudder and elevators were fabric covered.


    Dornier Wal – Elevator done

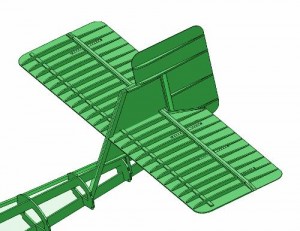
    The elevator is now done, and the rudder is about 50% completed. After I finish the rudder, I will cut some lightning holes.

    This aircraft had loads and loads of wing formers. I guess they were necessary on a 1920’s metal aircraft? The Dornier Wal was constructed less than 10 years after WWI, and the metal construction technology might not have been so advanced yet. Still, annoying having to cut so many, and I worry about the weight.


    Dornier Wal – Madrid Visit

    I will be visiting Museo del Aire Cuatro Vientos in Madrid early next month, to take photos of the Dornier Wal, amongst others. The photos should clear up a lot of the doubts that I have now, like strut profiles, attachment points etc. I will continue with the Wal model as soon as I return.

    Dornier Wal – Walk-around

    I am now back from the museum visit. It was really great to see this aircraft in real life, and I now have a ton of photos of the Dornier “Super” Wal.

    Dornier Wal – Engine struts

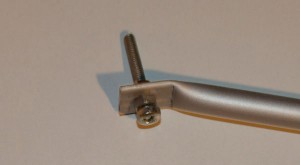
    I have been looking at various options for the struts that hold the engine. They have to be very strong, as all the propulsion power goes through these, yet they must also be very light. Here is what I came up with – Aluminium rods flattened at the end and mounted to the engine gondola/fuselage with 4mm screws. I have been pulling and wriggling these, trying to get them to break, but they didn’t budge.


    Dornier Wal – Fuselage mount

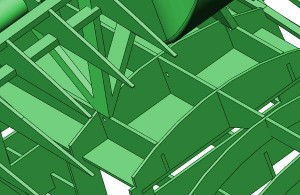
    The struts from the engine pod will be screwed into two runners made from fibreglass in the fuselage. While adding the runners, it occurred to me that I should make a watertight compartment around the engine mounting, so that the model’s hull will remain watertight, despite the strut-mounts inside the fuselage. It’s a little hard to see from the picture, but it WILL be watertight.


    Dornier Wal – The Ultimate Wal Book!

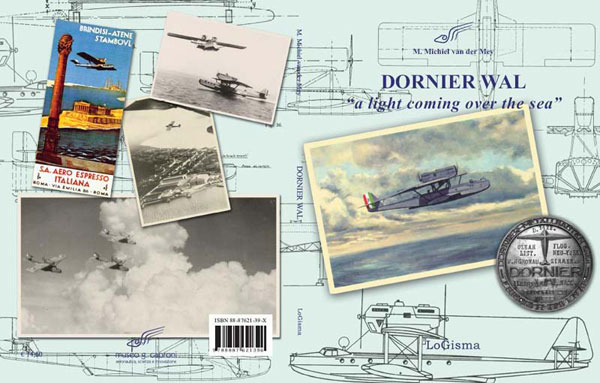
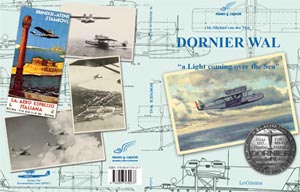
    I noticed that the definitive reference book about the Wal: “Dornier Wal a Light coming over the Sea”, is finally available from Michiel van der Mey. I quickly ordered a copy. This book is the most detailed book about the Dornier Wal available today.  You can order your copy here. The 25 Euro is well worth it – not only for the technical references, but also the history of the aircraft.

    I have been been in contact with Michiel for some time, and he has been a great source of reference material for my build.

    Dornier Wal – The word is out

    The word is getting out, that I am working on a Dornier Wal. An Italian author is looking for a Dornier Wal model for a marketing campaign of his new book.

    Dornier Wal – Longerons

    After cutting out groves for the longerons, it became obvious that the fuselage needed a wee bit of cleaning up. It should not take too long.

    Dornier Wal – Fuselage done

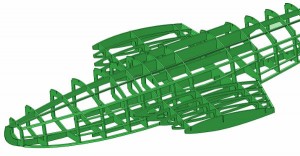
    The fuselage is finally complete. All the longerons, formers etc. now fit together well. The sub-wings are also blended in with the fuse. Finally, the fuselage is 100% watertight, with a room on top for installation of R/C equipment. Lovely!


    Dornier Wal – To-do list

    I need to do the following:

    • Elevators.
    • Rudder.
    • Strengthen fuselage where wings are attached.
    • Fuselage Longerons.
    • Add fuselage crutch.
    • Clean up sub-wings.
    • Ailerons.
    • Attachment of rudder and elevators.
    • Rudder, elevator and aileron horns.
    • Wing tips.
    • Empenage struts, brackets and bracing wires.
    • Engine pod and engine cowls.
    • Wing-struts and their attachments.
    • Loft nose and tail blocks.
    • Cockpit.
    • Fittings, doors, antennas, generators etc.
    • R/C installation.


    Dornier Wal – Related posts

    Comments

    • M.Michiel van der Mey  says:

      In the latest version of my book Dornier Wal a Light coming over the Sea from Pisa around the world. I presume that many open points of your “to do list” can be closed. Do visit our 15-language website http://www.dornier-wal.com and consider my book and the drawings.You can purchase the book forwhich the research started in 1935 (my mother) via paypal. Your comments are very welcome !


    Leave a reply