Category Tachikawa KI-55 Ida

Tachikawa Ki-55 – Introduction

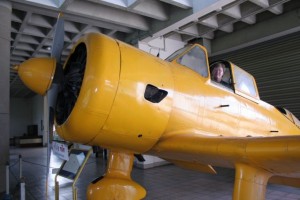
I have a special affection for this aircraft. I really don’t know why. It was the standard Japanese trainer in the time just around WWII. The last one lives here at the Royal Thai Air Force Museum, not too far from my home.

The Ki-36 (armed) and the Ki-55 (trainer) aircraft was designed in 1937 by a tream under chief engineer Endo Ryokichi, The final aircraft was approved by the Imperial Japanese Army Air Force in 1938. Exstensive flight-tests were conducted and in September 1938 two additional prototypes were build, bringing the total up to 4.

The aircraft had good forward visibility due to the 13 degree sweep of its wings. The engine was a 450 h.p. Hitachi Ha-13 with a two-blade variable pitch propeller.  Armament consisted of one forward firing 7.7mm Type 89 machine gun, and one flexible drum-fed Type 89 machine gun for the observer. The aircraft could carry five 12.5 kg bombs, four 15 kg bombs, three 50kg bombs under each wing.

The aircraft had side and floor windows and a type 96 fixed camera with electrical heater could be installed.

The aircraft was used in Manchuria and over China in the beginning of the war, but it’s slow speed made it obsolete as a fighting machine early on, and it was converted into a trainer (the Ki-55). The trainer had dual-pedal, extra instruments and dual-stick installed in the read, and the rear machine gun was removed.

A total of 861 were produced.

Specifications

Wing span: 11.8 m
Length: 8 m
Height: 3.64 m
Wing area: 20 sq.m
Weight empty: 1247 kg
Weight fuelled: 1783 kg
Max speed: 348 km/h
Cruising speed: 236 km/h
Landing speed: 100 km/h
Range: 1235 km
Landing Distance: 291 m
Takeoff distance: 234 m

Tachikawa Ki-55 – 3-Views

I have been studying this aircraft for almost 5 years now. I have collected a huge amount of data, including factory assembly drawings.

I have placed a video of this plane in the Video section. Be aware that the instrument panel and cockpit used in this video is actually the cockpit of the Ki-17 trainer. I guess the video editor screwed up, or thought noone would notice.

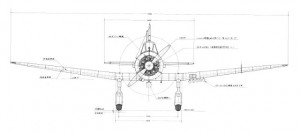
I bought a really expensive 3-view from a company in Japan that I wanted to use for the lofting of the fuselage formers. However, it turned out that the location of the stringers on the drawings were totally off and the formers were totally out of shape.

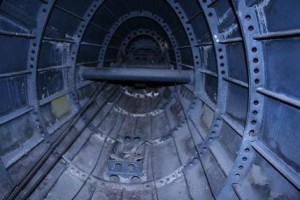
Next I went to the museum to get some photos of the Ki-55. This is what the fuselage looks like inside, looking back from the student’s/gunner’s seat.

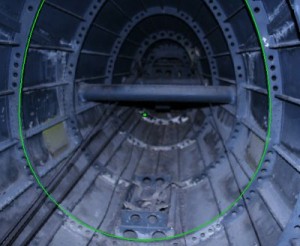
Using my paint program, I first traced the outline of the former. You can see that the picture was not taken completely centered.


Then I made two assumptions:

  • The airplane is at it’s widest at the thrust-line/center-line. 
  • Engineers are lazy. They won’t use any weird curves. They will stick to circles, ellipses and hyperbolas, unless there is a compelling reason not to. Besides, that’s what would have been available on their sets of french curves.

I then took out my super-expensive 3-view imported from Japan, and measured the distance from the thrust-line to the top, bottom and side of the fuselage, and got:

Top: 119.2 mm
Bottom: 69.6 mm
Side: 75.5 mm

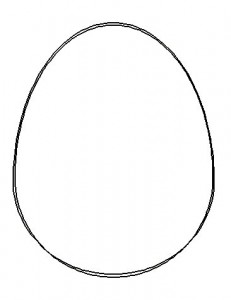
Finally, based on those measurements and my assumptions, I drew some ellipses and placed my “assumed shape” on top of the drawing traced from the photo.

It’s an almost perfect match.

I now know how to draw the remaining formers. It’s two semi-ellipses centered at the thrust-line.

Tachikawa Ki-55 – Formers

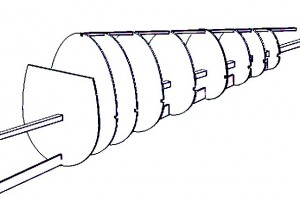
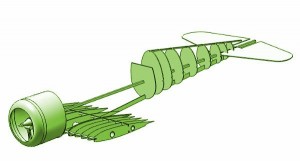
I have now started lofting the formers. This is quite easily done; use the 3-view and measure the width and height at each former location, as shown on the attached photo. Then use the knowledge about the shape, i.e. see the previous post, and draw the formers.

Here is what it looks like so far. The next bit is the fuselage at the cockpit section. At this point, I just concentrate on getting the correct external shape.

Tachikawa Ki-55 – Update

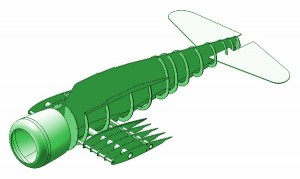
This is the latest update on this plane. It is slow going. Mostly because I am focusing on some of the other planes. In any case, I have got the cowl and the wing center section in place. I’m kind of strugging with the center part of the fuselage near the cockpit.

Tachikawa Ki-55 – New 3-Views

I have received new information from Japan. There is nothing in there that I didn’t already know for the Ki-55. However, for  the almost identical Ki-36, there is some new information. In particular, I now know how the machine gun was attached to the gun-ring.

I also have a new 3-view with some fuse formers. As I have already done the fuse formers, it might serve as a check that I what I have been doing is correct.

Tachikawa Ki-55 – Fuselage formers

The fuselage formers have now been drawn. there is still a minor issue with the canopy slides, and the transition after the last canopy. These are minor, and will be cleaned up when the longerons are drawn.

Tachikawa Ki-55 – Related posts

Comments


Leave a reply