Category Mitsubishi F1M2 Pete

Mitsubishi F1M2 Pete – Introduction

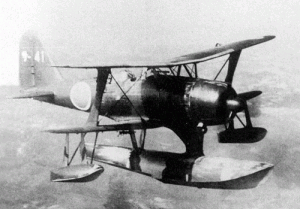
The Mitsubishi F1M2, also called Pete by the allies, was a Japanese Observation seaplane used in Papua New Guinea and surrounding countries during WWII. It was a biplane with a single centre float.

Specifications

Crew: two, pilot and rear gunner
Length: 9.5 m (31 ft 2 in)
Wingspan: 11 m (36 ft 1 in)
Height: 4 m (13 ft 1½ in)
Wing area: 29.5 m² (318 ft²)
Empty weight: 1,928 kg (4,251 lb)
Loaded weight: 2,550 kg (5,622 lb)
Max takeoff weight: 2,856 kg[2] (6,296 lb)
Powerplant: 1× Mitsubishi Zuisei 13 14-cylinder two-row radial engine, 653 kW (875 hp)
Maximum speed: 370 km/h (200 kn, 230 mph) at 3,440 m (11,300 ft)
Range: 740 km (400 nmi, 460 mi)
Service ceiling: 9,440 m (30,970 ft)
Wing loading: 86.3 kg/m² (17.7 lb/ft²)
Power/mass: 2.9 kW/kg (6.85 hp/lb)
Climb to 5,000 m (16,404 ft): 9 min 36 sec
2 × fixed forward-firing 7.7 mm (.303 in) Type 97 machine guns
1 × flexible rearward-firing 7.7 mm (.303 in) Type 92 machine gun
Bombs: 2 × 60 kg (132 lb) bombs


I will be modelling this in scale 1:5, giving the following dimensions:

Wing-Span: 2.20 m
Length: 1.90 m

Mitsubishi F1M2 Pete – 3-View

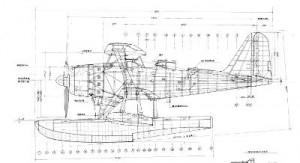
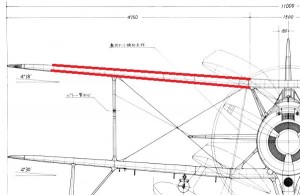
I got the 3-View for this aircraft from a book I ordered from Japan. The 3-view is extremely detailed, with all panel lines, and lots of detail information. The book also contained 3-views for the Tachikawa Ki-36, but they proved too inaccurate to use for lofting. Things are going a bit smoother with the F1M2 Pete, though.

Mitsubishi F1M2 Pete – Status Update

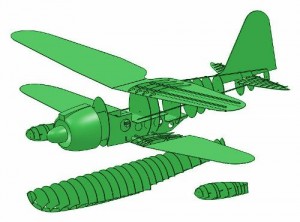
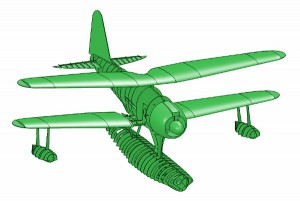
This shows the status as of today. This is the first sea-plane that I design, and things are going quite well. Another “first” is that I plan to build the centre wing section as an integral part of the fuselage. There should be no more surprises during the design of this aircraft – all that is left is hard work and dedication.

Mitsubishi F1M2 Pete – Float Attachment

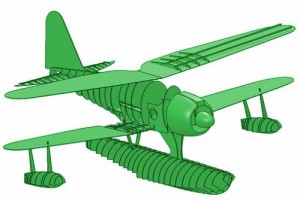
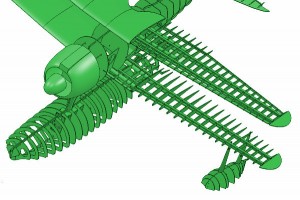
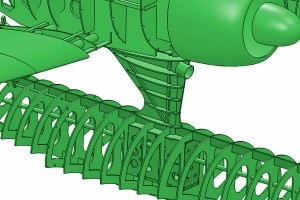
I have started on the float attachment. The main float is almost 1.5 m long, and carries the entire weight of the aircraft. To prevent it from folding during landing, I will reinforce the float as well as the struts internally. The update today shows the float struts, and gives an idea of where the plane and floats needs reinforcement.

Mitsubishi F1M2 Pete – Factory drawings

I have received a specialist book with factory assembly drawings and loads of photos from Japan. I have studied it, and didn’t find anything that makes it necessary to change my model. There is, however, a lot of detail drawings of struts and internal structures that are really really interesting, and immensely useful.


Mitsubishi F1M2 Pete – Struts

I have been working on the struts that hold the main float in place, as well as cleaning up some of the fuselage formers. This work will continue and then I will complete the main float. There should be no surprises here.

I really like how this airplane is starting to take shape. It looks very clean and straight-forward.

Mitsubishi F1M2 Pete – Wings

The wings were lofted based on the profile in the 3-view found in the Bunrindo book. I suspect it is a NACA airfoil, but I have not verified this.

The upper and lower wings are slightly different in the real aircraft, due to the wing-folding mechanism. While the wing separation points are in the right position for folding wings, I do not plan to model folding wings.

Mitsubishi F1M2 Pete – Wings part 2

Unfortunately the wings did not prove as easy as first though. The inner 5 wing ribs have the same length, but different height. The same applies to the ribs near the wing tip. If these problems are not fixed, the wings will not have flat surfaces. That the Japanese knew about this issue can be seen in the wing spars that are not parallel.


Mitsubishi F1M2 Pete – Wings part 3

Today I finally got the shape of the wings right. I also got the top wings done, and about 50% of the lower wings. The upper wing has ailerons, while the lower wing has ailerons, flaps and a part of the wing that can fold up for the wing-folding.


Mitsubishi F1M2 Pete – Float clean up

I spent the evening cleaning up the main float. It was not too bad, but about +/- 0.5 mm out at some places. It would have required a lot of sanding, had I not fixed it. Now it is smooth, with nice flowing lines.

I also reenforced the float. I have never built a float-plane before, so I’d better err on the side of caution. I ended up with a 25 mm diameter aluminium tube linking the fuselage and the float. To take the landing forces, I incorporated a plywood box and a metal tube along the entire length of the float, to spread the force of the impact when landing.


Mitsubishi F1M2 Pete – Fuselage shape

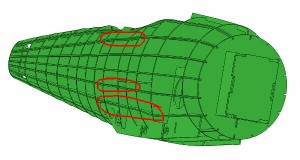
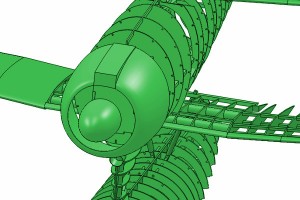
The stringers are in place. Any problems with the fuselage formers stands out as a sore thumb at this stage in the design. Luckily it is only one or two formers on this design.

I have found a new and better way of drawing the fuselage, so this problem will be much smaller in the future. The Mitsubishi F1M2 was drawn the old way, however, so there is no way around a bit of clean-up before I can continue.

Mitsubishi F1M2 Pete – Upper wings

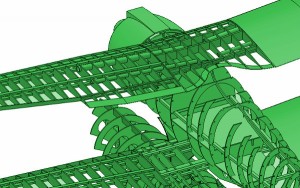
The center section of the upper wing is now done. It took 6 hours, but now I am sure the shape is good, and it is possible to build. I have also cleaned up the fuselage a bit, but not 100% done with that yet.

Mitsubishi F1M2 Pete – Main float attachment

The main float will be attached to the fuselage using a metal tube. The outer shape of the attachment will be made using either a fibre-glass or a plastic molded shell. The internals will be constructed using three or four formers epoxied to the metal tube, to keep the shell from warping. Alternatively it can be fully built up. I just had the idea of hiding the heavy batteries in the floats, for better stability, but since it should be waterproof, this may be a bad idea? I have drawn the fairing but it needs a bit of cleaning up, before I can show a picture of it.

Mitsubishi F1M2 Pete – While I am at it

I have actually drawn the upper ailerons, but am a bit unsure about the actual width of them. The dimensions in the Bunrindo book does not tally with the drawing. Once I figure it out I am done with the upper wing.

Next, I have decided to do the fuselage in one piece and the wing fairings separately. So far I have tried to combine the wing fairings with the fuselage formers, but it proved too difficult.

Another thing I need to establish, is the way the centre piece of the upper wing is attached to the fuselage. It should be quite a simple matter to replicate it with some piano wire.

These are all little things that should not take long to complete.

Mitsubishi F1M2 Pete – Float attachment

The float attachment is now done, as are the formers for the epoxy/plastic shroud that goes around it.

Mitsubishi F1M2 Pete – Lower wing

The centre section is now done. What I need to do now is to marry it to the fuselage.

Mitsubishi F1M2 Pete – Upper wings done

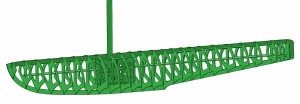
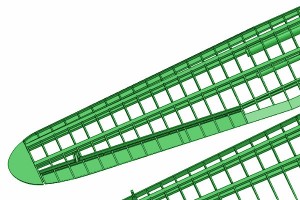
The upper wings are done. It did not take a lot of time cleaning them up. I found that the counter-weight for the aileron was in the wrong place, and the width of the aileron was off by 10 mm, but that was all. The left upper wing is shown here without its balsa sheeting. The right wing is mirrored, but otherwise identical. The ailerons are fabric covered.


Mitsubishi F1M2 Pete – To-do List

I need to complete the following:

  • Main float shape.
  • Main float attachments.
  • Centre section of upper wing.
  • Centre section of lower wing incl. 5 degree wing attachment
  • Upper wing – leading edge, trailing edge and ailerons.
  • Lower wing – trailing edge, leading edge, cut-outs.
  • Marry lower centre section to fuselage.
  • Marry upper centre section to fuselage.
  • Lower wing ailerons and flaps.
  • Wing struts.
  • Main float stringers.
  • Float struts.
  • Fuselage shape.
  • Fuselage Longerons.
  • Fuselage sheeting.
  • Rudder.
  • Elevator.
  • Engine mount.
  • Lumps and Bumps.
  • Clean-up of all parts.
  • R/C Installation.


Mitsubishi F1M2 Pete – Related Posts

Comments

  • Gavin Spink  says:

    Hi there
    Will you be selling copies of the 1.5 scale F1M2 Float plane?
    Thanking you
    Gavin

  • Gavin Spink  says:

    My email address correction is gavinspink2@gmail.com

  • admin  says:

    Yes I will, but it’s slow going right now.

  • Gavin Spink  says:

    Hi
    Wondering how the F1M2 is comming along.

  • LF van der Linde  says:

    Hi, im currenty about to finish a 1:20 scale aluminum static model of a KI-44, as soon as this one is finished, id like to start on a 1:20 sclae F1M2, is there any chance you could send me any drawings or plans?? i would be imensly gratefull.

    Thanks in advance,

    Luuk van der Linde

  • Don Carner  says:

    Have you completed your planset yet???

  • Mike Quinn  says:

    Hi

    I’m very interested in getting a copy of the 3 view drawings for the F1M2 Pete. Can you let me know where you sourced the book mentioned in your post dated 24/11/2011


Leave a reply