 The difference between the typical garden shed or garage shop for general work, and the room required by model airplane building is quite large. In general, get as large a space as possible, and remember, you also need a space for storing your models once they are completed.
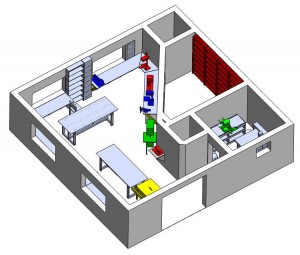
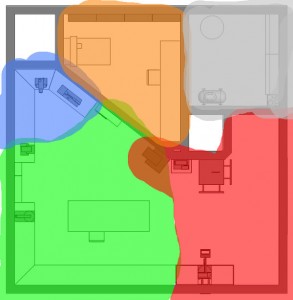
The picture shows a model of my own workshop. This is a fairly large workshop, but still not ideal. I will discuss this later on in this article.
Beginner’s workshop
For beginners, a combination of the dining-room table and the kitchen table works fine. However, this may soon become restrictive as the size and complexity of the models increase.
R/C Scale model builder’s workshop
In the following I will discuss how to arrange your tools in a workshop for more experienced builders. The layout of the room obviously depends on its size, as well as the size of the models you plan to build. Don’t forget that a model airplane with a wingspan of around 2 meter takes up almost as much floor-area as a small car!
In the ideal world, the building room would be around 5 x 6 meter, and must have a large building table in the middle of the room. This location makes it possible to walk around the airplane, and access it from all sides. Second best, and a solution that works for many many successful model makers, is a building table along one wall. No matter where the building table is placed, It is a good idea to get a large solid table along at least one wall. Get lots and lots of shelf space, and lots and lots of drawers for storing stuff is essential.
Many builders uses half of their two-car garage, a room in the attic, or build a shed in the garden for their hobby. In my own case, I bought the house that I live in, because the downstairs used to house an old car repair shop. The car repair shop was split into two areas – a heated area, shown in the attached drawing – and a non-heated four-car garage.
Arranging the tools
 All tools should be arranged around in logical order. By logical order, the most dusty machines should be placed away from your painting area.
Try to place the heavier tools along one side of the room. This could include table-saws, band-saws, fret-saws, belt-sanders, mills and lathes. Smaller tools can be hung on the wall on hole-boards. Electrical hand-tools must be stored as well.
Electricity, water and air
You can never get too many electrical outlets. In my own workshop, I have outlets IN the table, at about 6 feet intervals around the walls.I am lucky to have running water and a sink too, although this is not really necessary.
For compressed air, it may be a good idea to place the compressor outside the room, and pipe it into the room from outside. Valves, metal pipes and other fittings are available that can handle compressed air.
Since modellers sand a lot, it is essential to get a good shop vacuum cleaner and an air filter. Arrange the sanding area, so that they are away from your paint area.
Materials and plans
A rack for storing materials, wood, metal etc. is a good idea, and so is a rack for storing drawings and construction plans.
Spray-painting with anything larger than an airbrush should take place outdoors, in the garage, or somewhere else than the woodshop.
Remember!
Don’t forget good ventilation, dust-filters and AMPLE LIGHTING.


Hola! I’ve been following your web site for a long time now and finally got the courage to go ahead and give you a shout out from Austin TX! Just wanted to tell you keep up the excellent work!
Thanks Lempka. A lot of interesting model airplanes will be coming here soon.